If you own a Keurig coffee maker, you know how important it is to keep it clean and running smoothly. But did you know there’s a simple tool designed to make maintenance easier and faster?
The Keurig Brewer Maintenance Accessory Tool can save you time and frustration by helping you tackle common problems like clogs and buildup. You’ll learn exactly how to use this tool step-by-step, so your coffee maker stays in top shape and your morning brew tastes great every time.
Ready to make your Keurig work like new again? Keep reading!

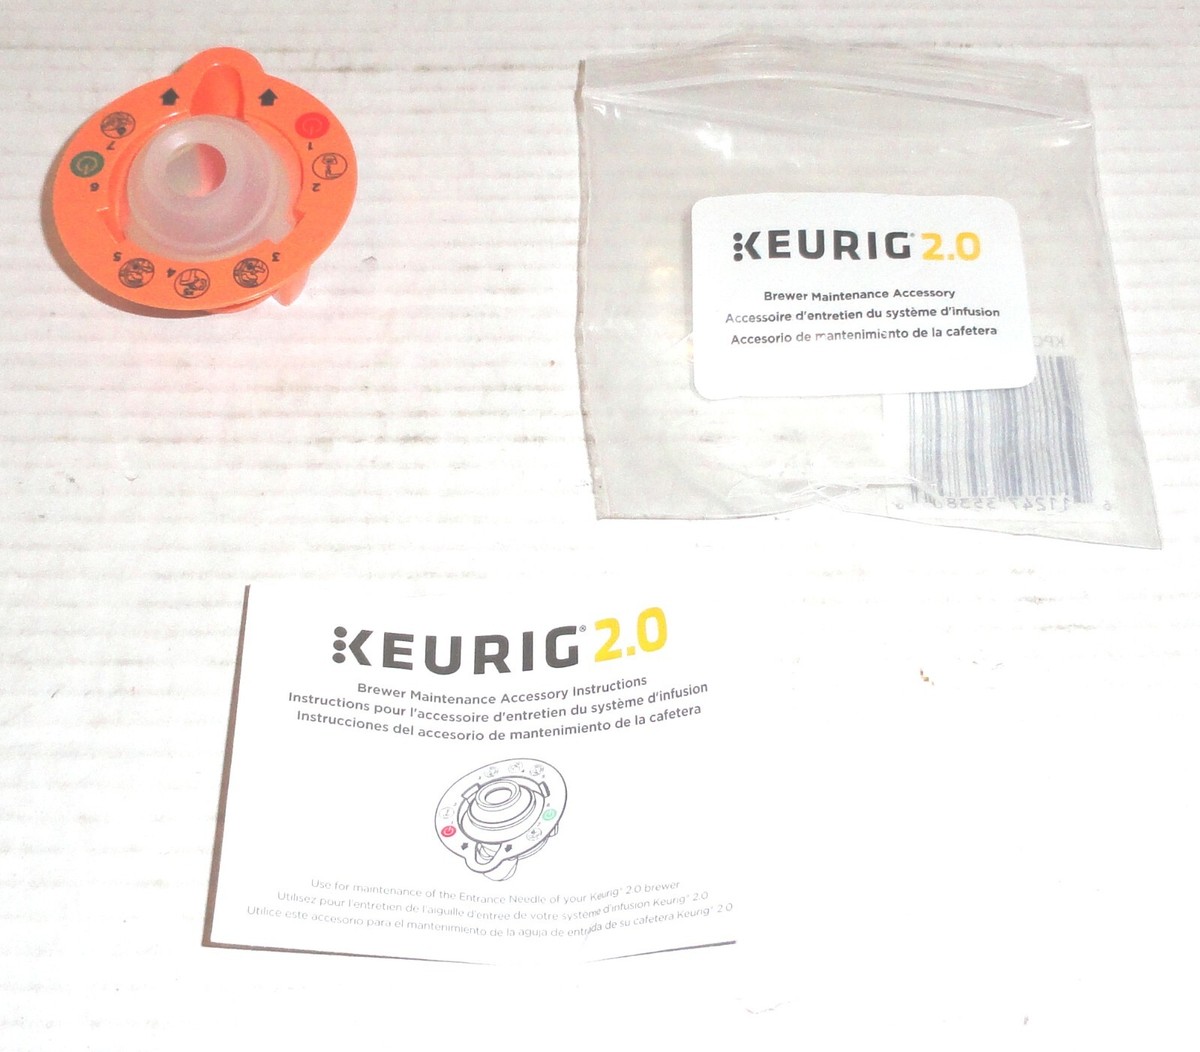
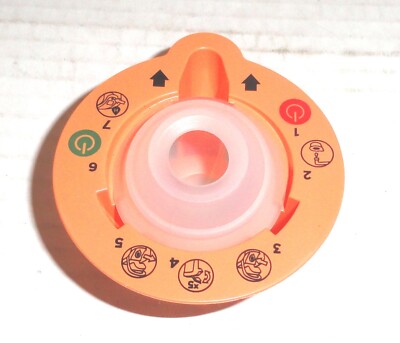
Credit: www.ebay.com
What Is The Keurig Brewer Maintenance Accessory Tool
The Keurig Brewer Maintenance Accessory Tool is a simple device designed to keep your coffee maker in top shape. It helps clean and maintain your Keurig brewer, ensuring it works smoothly every day.
This tool targets parts of the machine that are hard to reach. It helps remove buildup and coffee grounds that can block water flow. Using it regularly can extend the life of your brewer and improve coffee taste.
What Does The Keurig Brewer Maintenance Accessory Tool Include?
- Cleaning brushes of different sizes
- Needle cleaning tool to unclog the exit needle
- Descaling solution or pods for mineral buildup
- Small scraper to remove debris
Why Use The Keurig Brewer Maintenance Accessory Tool?
- Prevents clogging and uneven water flow
- Maintains coffee flavor quality
- Reduces the need for repairs
- Keeps the machine hygienic and safe
Who Should Use The Keurig Brewer Maintenance Accessory Tool?
Anyone who owns a Keurig brewer can benefit. It is especially useful for daily users and those who want their machine to last longer. The tool is easy to use and does not require special skills.
Benefits Of Regular Maintenance
Keeping your Keurig brewer in top shape isn’t just about having a fresh cup of coffee every time. Regular maintenance using the Keurig Brewer Maintenance Accessory Tool ensures your machine runs smoothly and lasts longer. It also helps you avoid unexpected breakdowns that can ruin your morning routine.
Improved Coffee Taste And Quality
Over time, mineral deposits and coffee residue build up inside your Keurig. This buildup can affect the flavor and temperature of your coffee. Using the maintenance tool regularly cleans these deposits, so every cup tastes just as good as the first one you brewed.
Have you ever noticed your coffee tasting bitter or weak? Cleaning your brewer can fix that problem quickly.
Extended Machine Lifespan
Regular cleaning prevents wear and tear on your Keurig’s internal parts. The maintenance accessory tool helps remove clogs and buildup that can cause the machine to work harder than necessary. This reduces the risk of costly repairs or needing a replacement.
Think of it as giving your Keurig a little TLC that pays off in years of reliable use.
Prevents Malfunctions And Clogs
Clogs in the needle and water lines can stop your Keurig from brewing properly. The maintenance tool is designed to clear these blockages easily. This means fewer interruptions and more consistent performance every time you press the brew button.
Would you rather deal with a quick cleaning session or an unexpected machine breakdown?
Saves Time And Money
Ignoring maintenance often leads to expensive repairs or a new machine purchase. The accessory tool is a small investment that saves you money by avoiding these costs. Plus, it only takes a few minutes to use.
Regular upkeep means less hassle and more time enjoying your favorite coffee.
Preparing Your Keurig For Maintenance
Before you dive into using the Keurig Brewer Maintenance Accessory Tool, setting up your machine properly is key. Taking the time to prepare your Keurig ensures a smoother, safer maintenance process. It also helps avoid any damage to your brewer and makes cleaning more effective.
Gather Necessary Supplies
Start by collecting all the items you’ll need. This usually includes the maintenance accessory tool itself, a clean cloth, mild dish soap, and fresh water. Having everything ready before you begin prevents interruptions and keeps you focused.
Think about keeping a small container nearby for any parts you remove. It’s easy to lose tiny components like the needle or filter if you don’t have a safe spot for them. Do you have all your supplies within arm’s reach?
Power Off And Unplug
Safety comes first. Always turn off your Keurig and unplug it from the wall before starting any maintenance. This simple step protects you from electrical hazards and prevents the machine from accidentally turning on.
Unplugging also allows the brewer to cool down. Hot parts can cause burns or damage your tools during cleaning. Have you ever skipped this step and wished you hadn’t?
Using The Maintenance Accessory Tool
The Keurig Brewer Maintenance Accessory Tool helps keep your coffee maker clean and running smoothly. Using this tool regularly improves the taste of your coffee. It also extends the life of your machine by preventing clogs and buildup. The process is simple and takes only a few minutes.
Step-by-step Instructions
- Unplug the Keurig machine to ensure safety.
- Remove the water reservoir and empty any remaining water.
- Take out the needle cover from the brew head carefully.
- Insert the maintenance accessory tool into the brew head.
- Turn the tool gently to loosen any coffee grounds or debris.
- Rinse the tool and the brew head area with warm water.
- Replace the needle cover and reattach the water reservoir.
- Plug the machine back in and run a water-only brew cycle.
- Wipe the exterior of the machine with a damp cloth.
Common Mistakes To Avoid
- Do not force the tool into the brew head; it may cause damage.
- Avoid skipping the water-only brew cycle after cleaning.
- Never use harsh chemicals or abrasive materials with the tool.
- Do not forget to unplug the machine before starting maintenance.
- Ensure the needle cover is securely replaced to prevent leaks.
- Don’t clean the tool only once; regular maintenance is key.
Cleaning And Descaling The Brewer
Keeping your Keurig brewer clean and free from mineral buildup is key to enjoying every cup of coffee at its best. Regular cleaning and descaling not only extend the life of your machine but also improve the flavor of your brew. Let’s look at the best products to use and the exact steps for descaling your brewer with the maintenance accessory tool.
Recommended Cleaning Products
Choosing the right cleaning products can make a huge difference in maintaining your Keurig. Avoid harsh chemicals that might damage the internal parts or leave an unpleasant taste.
- White vinegar:A natural and effective descaler that removes mineral deposits quickly.
- Keurig descaling solution:Specifically formulated for Keurig machines, ensuring safe and thorough cleaning.
- Dish soap:Use mild dish soap for cleaning the external parts and removable components.
- Distilled water:Helps prevent new mineral buildup when brewing your coffee.
Have you ever noticed your coffee tastes different over time? That’s often a sign it’s time to clean your brewer.
Descaling Process
Using the Keurig maintenance accessory tool makes descaling straightforward and efficient. Start by emptying any water from the reservoir.
- Fill the reservoir with the descaling solution or white vinegar mixed with water as directed on the product label.
- Attach the maintenance accessory tool to your brewer to allow thorough access to internal parts.
- Run a brew cycle without a K-Cup, allowing the solution to pass through the machine.
- Repeat until the reservoir is empty, then let the brewer sit for about 30 minutes to break down mineral buildup.
- Rinse the reservoir and fill it with fresh water.
- Run several brew cycles with just water to flush out any remaining descaling solution or vinegar taste.
How often you should descale depends on your water hardness and usage, but a good rule is every 3-6 months. Doing this keeps your brewer in top shape and your coffee delicious.

Credit: www.amazon.com
Troubleshooting Common Issues
Troubleshooting common issues with the Keurig Brewer Maintenance Accessory Tool can save you time and frustration. Sometimes the tool might not fit as expected, or your brewer may keep malfunctioning despite your efforts. Understanding these problems helps you handle them confidently and keep your coffee routine smooth.
Tool Not Fitting Properly
If the maintenance tool doesn’t fit your Keurig brewer correctly, first double-check the model compatibility. Not all tools work with every Keurig version, so confirm yours matches the accessory specifications.
Inspect the tool for any debris or damage that might block a snug fit. Even small particles can prevent proper alignment. Cleaning the tool gently with a soft cloth often solves this.
Have you tried applying slight pressure while inserting the tool? Sometimes the seal feels tight initially but settles into place with a bit of careful force. Avoid forcing it too hard to prevent damage.
Brewer Still Malfunctioning
Using the maintenance tool doesn’t always fix every brewing issue. If your brewer keeps malfunctioning, check if the problem relates to the water reservoir or internal components.
Run a thorough descaling cycle after using the tool, as mineral buildup might be the hidden cause. If errors persist, resetting your brewer by unplugging it for a few minutes can clear glitches.
Consider whether the tool was used correctly in the first place. Misuse can leave residue or blockages inside the machine. Reviewing the instructions again might reveal a missed step.
Have you noticed patterns in when the malfunction happens? Identifying specific triggers can guide your next troubleshooting move or help when you contact Keurig support.
Tips For Extending The Life Of Your Keurig
Keeping your Keurig brewer in top shape saves money and time. Small efforts go a long way. Follow simple tips to extend your machine’s life. These tips improve performance and prevent breakdowns. Use the Keurig Brewer Maintenance Accessory Tool effectively with these easy steps.
Regular Maintenance Schedule
Set a regular cleaning routine for your Keurig. Clean the water reservoir and drip tray weekly. Use the maintenance tool to clear the needle and remove clogs. Descale your machine every 3-6 months to avoid mineral buildup. Regular care keeps the brewer working smoothly and tasting great.
Proper Storage Practices
Store your Keurig in a dry place away from direct sunlight. Remove the water reservoir if not using for a long time. Clean and dry all parts before storage to prevent mold growth. Cover your brewer with a cloth to keep dust away. These simple habits protect your machine from damage and wear.
Credit: www.ebay.com
Frequently Asked Questions
What Is The Keurig Brewer Maintenance Accessory Tool?
The Keurig Maintenance Accessory Tool helps clean and maintain your Keurig machine. It removes coffee residue and unclogs needles for optimal brewing.
How Do I Use The Keurig Maintenance Accessory Tool?
Insert the tool into the needle area gently. Rotate it to clear blockages, then rinse the tool and needle for best results.
How Often Should I Use The Maintenance Tool?
Use the tool every 1-3 months, depending on your brewing frequency. Regular use ensures consistent coffee quality and extends machine life.
Can The Tool Prevent My Keurig From Malfunctioning?
Yes, cleaning with the tool prevents clogs and buildup. This reduces the risk of errors and keeps your Keurig running smoothly.
Conclusion
Using the Keurig Brewer Maintenance Accessory Tool keeps your machine clean and working well. Regular cleaning stops clogs and improves coffee taste. The tool fits easily and helps reach hard spots inside. Spend a few minutes each week to keep your brewer in top shape.
Clean parts mean better coffee every day. Taking care of your Keurig is simple with the right tool. Enjoy fresh, smooth coffee without problems. A small step that makes a big difference.