If you want your Keurig machine to keep brewing fresh, delicious coffee every day, using the Keurig Maintenance Tool is a must. You might not realize it, but regular care can save you from frustrating clogs, slow brewing, or bitter-tasting coffee.
This tool is designed to make cleaning and upkeep simple, even if you’re not tech-savvy. You’ll discover exactly how to use the Keurig Maintenance Tool to keep your machine running smoothly and your coffee tasting perfect. Keep reading—you’ll be surprised how easy it is to extend the life of your favorite coffee maker.
Keurig Maintenance Tool Basics
Keeping your Keurig coffee maker in top shape can save you time and money. Understanding the basics of the Keurig Maintenance Tool is essential for this. It helps you maintain your machine’s performance and ensures every cup tastes great.
What Is The Keurig Maintenance Tool
The Keurig Maintenance Tool is a simple yet powerful device designed to clean and maintain your coffee maker. It targets hard-to-reach areas, like the needle that punctures the pods. Regular use prevents clogs and buildup that can affect taste and machine function.
I once ignored cleaning my Keurig, and it started brewing weak coffee. After using the maintenance tool, the flavor bounced back instantly. This shows how important it is to keep your machine clean.
Why Maintenance Matters
Over time, mineral deposits from water build up inside your Keurig. These deposits block water flow and reduce the quality of your brew. Without proper maintenance, your machine might stop working altogether.
Regular maintenance also extends the life of your Keurig. It saves you from costly repairs or replacements. Would you want your morning coffee routine interrupted by a broken machine?
Tools Included In The Kit
The Keurig Maintenance Tool kit usually includes:
- Needle Cleaning Tool:Designed to clear clogs in the pod piercing needle.
- Water Filter Handle:Helps replace and install water filters easily.
- Descaling Solution or Packets:Breaks down mineral buildup inside the machine.
- Cleaning Brushes:Reach tight spots to remove coffee grounds and debris.
Having these tools at hand makes maintenance straightforward. You don’t have to guess what to clean or how to do it.
Preparing For Maintenance
Preparing your Keurig for maintenance is key to keeping it working well. This step helps avoid damage and ensures the tool works correctly. Taking time to prepare makes the cleaning process smooth and safe.
When To Use The Tool
Use the Keurig maintenance tool if your coffee tastes weak or strange. If the machine leaks or takes longer to brew, it needs cleaning. Regular use after every few months helps keep the machine fresh.
Gathering Supplies
Collect all items before starting maintenance. You will need:
- Keurig maintenance tool
- Clean cloth or paper towel
- Fresh water
- Mild dish soap (optional)
- A small brush or toothpick
Having everything ready saves time and avoids interruptions.
Safety Precautions
Unplug the Keurig before starting any maintenance. Avoid using harsh chemicals that can harm the machine. Work in a dry area to prevent electric shock. Handle all parts carefully to avoid damage.
Cleaning The Water Reservoir
Keeping your Keurig’s water reservoir clean is key to brewing fresh-tasting coffee every time. Over time, mineral deposits and residue can build up, affecting the flavor and performance of your machine. Regular cleaning with the right tools helps maintain both taste and machine longevity.
Removing And Rinsing
Start by carefully lifting the water reservoir from your Keurig. Handle it gently to avoid spills or damage.
Empty any remaining water and rinse the reservoir thoroughly with warm water. Avoid using harsh soaps, as they can leave behind residues that alter your coffee’s taste.
Pay attention to corners and edges where buildup tends to hide. Have you noticed a gritty texture or cloudy water? That’s a sign it’s time to clean.
Using The Maintenance Tool
Your Keurig maintenance tool is designed to make cleaning easier and more effective. Attach the tool to the reservoir’s opening as directed in your manual.
Use it to scrub away stubborn mineral deposits and slimy buildup. Move the tool gently but firmly to reach every surface inside the reservoir.
Don’t rush this step—spending a few extra minutes ensures you remove hidden grime that affects water quality.
Drying And Reassembly
After cleaning, dry the reservoir completely with a soft cloth or let it air dry. Moisture left inside can encourage mold growth or bacterial buildup.
Once dry, carefully place the reservoir back onto your Keurig. Make sure it fits snugly to avoid leaks during brewing.
Next time you brew, notice the difference clean water can make. Isn’t it amazing how such a simple routine refreshes your coffee experience?
Descaling With The Tool
Descaling with the Keurig maintenance tool keeps your coffee maker clean and efficient. It removes mineral buildup inside the machine. This buildup can affect taste and machine performance. Regular descaling helps your Keurig last longer and brew better coffee.
Choosing The Right Descaling Solution
Select a descaling solution made for Keurig machines. Use either a Keurig brand descaler or a vinegar solution. Avoid harsh chemicals that may damage the machine. Read product labels to ensure safety and effectiveness. Using the correct solution protects your Keurig and improves cleaning.
Step-by-step Descaling Process
- Turn off and unplug your Keurig machine.
- Empty the water reservoir completely.
- Fill the reservoir with the descaling solution or vinegar mix.
- Place a large mug on the drip tray.
- Run a brew cycle without a K-Cup pod.
- Repeat until the reservoir is empty.
- Let the machine sit for 30 minutes to an hour.
- Rinse and repeat the brew cycle if necessary.
Post-descaling Rinse
After descaling, fill the reservoir with fresh water only.
Run multiple brew cycles to rinse the machine well.
This removes any leftover descaling solution taste or smell.
Rinse until the water runs clear and tastes fresh.
Clearing The Needle And Brew Head
Clearing the needle and brew head is essential to keep your Keurig brewing smoothly and tasting great. Over time, coffee grounds and mineral deposits can build up, causing clogs that affect water flow and brewing quality. Using the Keurig maintenance tool properly helps you tackle these blockages and restore your machine’s performance.
Identifying Clogs
Have you noticed your Keurig taking longer to brew or producing weak coffee? These are common signs of a clogged needle or brew head. Visually inspecting the needle for coffee grounds or buildup is a good start. If water doesn’t flow freely through the brew head, that’s another clear indicator.
Using The Tool To Clear Blockages
The Keurig maintenance tool is designed specifically to reach inside the needle and remove debris safely. Insert the tool gently into the needle area, twisting slightly to dislodge any trapped grounds or mineral deposits. Don’t force it—you want to clear the blockage without damaging the delicate parts inside.
Cleaning the brew head involves wiping and sometimes scraping off residue with the tool’s flat edge. Regular use of the tool prevents buildup from becoming a bigger problem. It’s much easier to maintain a clean machine than to fix one that’s heavily clogged.
Testing For Proper Flow
After clearing the needle and brew head, run a water-only brew cycle without a K-cup. Watch the water flow closely—does it pour steadily without sputtering? If the flow is smooth and consistent, your machine is back to normal.
If the water still drips slowly or unevenly, repeat the cleaning process or check for other blockages. Testing flow after maintenance ensures your coffee will taste as fresh and strong as it should.
Maintaining The Drip Tray And Exterior
Keeping your Keurig clean goes beyond just brewing great coffee. The drip tray and exterior are often overlooked spots that can collect residue and grime, affecting both the look and function of your machine. Regular care here not only keeps your Keurig looking fresh but also prevents unwanted buildup that can impact your coffee experience.
Removing And Cleaning The Drip Tray
The drip tray catches spills and overflow, so it’s prone to getting sticky or stained. Gently pull the tray out from the base—it usually slides out easily without any tools.
Once removed, wash it with warm, soapy water. Use a soft sponge to remove any coffee stains or buildup. Rinse well and dry completely before sliding it back in place.
Have you noticed any strange smells coming from your drip tray? Cleaning it regularly can help eliminate odors and keep your kitchen smelling fresh.
Wiping Down The Exterior
Dust, fingerprints, and coffee splashes can quickly make your Keurig look neglected. Use a damp microfiber cloth to wipe down the machine’s outer surfaces.
For tougher spots, add a drop of dish soap to the cloth, then wipe again with a clean, damp cloth to remove soap residue. Avoid abrasive cleaners that can scratch the finish.
Don’t forget the buttons and display area; these spots accumulate grime and affect the machine’s appearance and usability.
Preventing Mold And Mildew
Moisture trapped in the drip tray or on the exterior can invite mold and mildew. Always dry the drip tray thoroughly after cleaning to prevent dampness.
Leave the water reservoir lid open occasionally to allow air circulation, reducing moisture buildup inside the machine.
Have you ever found mold in your Keurig? Taking small steps like these protects your machine and ensures every cup tastes fresh and clean.
Regular Maintenance Schedule
Keeping your Keurig coffee maker in top shape needs a regular maintenance routine. This routine helps keep the machine clean and working well. It also improves the taste of your coffee and extends the machine’s life. Follow these daily, weekly, and monthly tasks for the best results.
Daily Tasks
- Empty used coffee pods from the machine.
- Rinse the drip tray and water reservoir with clean water.
- Wipe the exterior with a damp cloth to remove dust and spills.
- Run a water-only brew cycle to flush out any coffee residue.
Weekly Cleaning
- Remove and wash the water reservoir with warm, soapy water.
- Clean the needle that punctures the pods using a paperclip or needle tool.
- Soak removable parts like the drip tray and pod holder in warm water.
- Use a soft brush to clean small crevices and the area around the needle.
Monthly Deep Maintenance
- Run a descaling solution through the machine to remove mineral buildup.
- Follow the descaling instructions on the Keurig maintenance tool packaging.
- After descaling, run several water-only cycles to rinse the machine thoroughly.
- Check and replace any worn parts like water filters or seals.

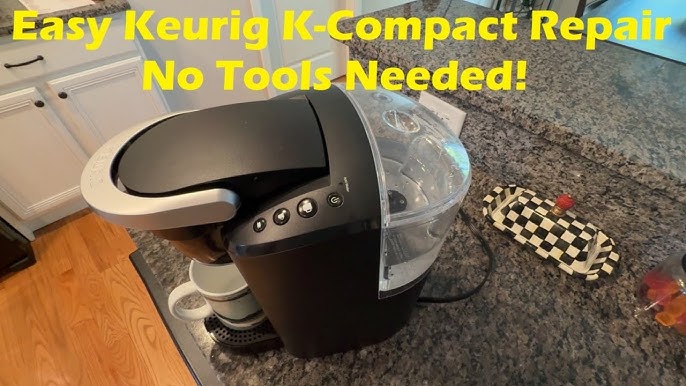
Credit: www.yahoo.com
Troubleshooting Common Issues
Troubleshooting common issues with your Keurig machine helps keep it working well. The Keurig maintenance tool solves many problems quickly. Understanding how to identify and fix these issues saves time and prevents damage. Below are solutions for frequent problems like no brewing, strange sounds, and leaks.
Machine Not Brewing
Check if the water reservoir is full. A low water level stops brewing. Clean the needle that punctures the K-Cup. Blockages prevent water flow. Use the maintenance tool to flush out clogs. Make sure the K-Cup is inserted correctly. Sometimes the machine needs a simple reset by unplugging it for a few minutes.
Unusual Noises
Grinding or loud sounds indicate a clog or air in the system. Run the maintenance tool’s cleaning cycle to clear blockages. Ensure the water reservoir is seated firmly. Loose parts cause vibration noises. Descale the machine regularly to avoid mineral buildup. These steps reduce noise and improve brewing quality.
Water Leaks
Leaks often come from loose connections or cracks. Check the water reservoir for cracks or damage. Clean the seal around the reservoir to ensure a tight fit. Use the maintenance tool to inspect and clean internal parts. Avoid overfilling the water tank. Leaks stop once all parts fit correctly and are clean.
Extending Keurig Lifespan
Extending the lifespan of your Keurig coffee maker ensures it brews delicious coffee for years. Regular maintenance and proper care keep the machine running smoothly. Small habits make a big difference in performance and durability.
Proper Storage Tips
Store your Keurig in a dry, cool place away from direct sunlight. Avoid places with high humidity or temperature changes. When not in use for a long time, empty the water reservoir. Clean and dry all removable parts before storing. Cover the machine to prevent dust buildup.
Avoiding Common Mistakes
Use only clean, fresh water to prevent mineral buildup. Avoid using flavored or sugary liquids that can clog the system. Do not leave water sitting in the reservoir for days. Always clean the needle that pierces the K-Cup. Follow manufacturer instructions for descaling and cleaning.
When To Replace Parts
Replace the water filter every two months to maintain water quality. Change worn-out or damaged parts like the drip tray or K-Cup holder. If brewing slows or the machine leaks, check for faulty seals or needles. Keep spare parts handy for quick fixes. Regular replacements keep your Keurig working well.

Credit: www2.ccipirineusmed.com

Credit: www.amazon.ca
Frequently Asked Questions
What Is A Keurig Maintenance Tool?
The Keurig Maintenance Tool is designed to keep your Keurig coffee maker functioning smoothly. It helps unclog needles and removes calcium deposits. Regular use ensures optimal performance and longevity of your machine. This tool is essential for maintaining the quality and taste of your coffee.
How Often Should I Use The Tool?
It’s recommended to use the Keurig Maintenance Tool every three to six months. Frequency depends on your usage and water hardness. Regular maintenance prevents clogs and ensures your machine runs efficiently. Consistent care can prolong your coffee maker’s life and enhance your coffee experience.
Can I Use The Tool On All Keurig Models?
Yes, the Keurig Maintenance Tool is compatible with most Keurig models. However, always check your specific model’s manual for compatibility. Using the tool ensures your machine remains in top condition. Proper maintenance can save you from costly repairs and replacements.
How Do I Clean The Keurig Maintenance Tool?
To clean the Keurig Maintenance Tool, rinse it under warm water. Use a mild detergent if needed. Ensure it’s completely dry before storing or reusing. Regular cleaning of the tool ensures its effectiveness and longevity. Proper care keeps your Keurig machine running smoothly.
Conclusion
Using the Keurig maintenance tool keeps your machine clean and working well. Regular care helps avoid clogs and improves coffee taste. It saves time and money on repairs. Simple steps make the process quick and easy. Keep your Keurig ready for every cup you want.
A little maintenance goes a long way. Enjoy fresh coffee without hassle each day. Take care of your machine and it will serve you longer.