Are you tired of Kodi running slow or crashing at the worst moments? Adding a maintenance tool to Kodi can be the game-changer you need.
It helps keep your Kodi clean, fast, and hassle-free. In this guide, you’ll learn exactly how to add a maintenance tool step-by-step, so you can enjoy smooth streaming without interruptions. Keep reading—you’re just minutes away from making your Kodi experience better than ever.

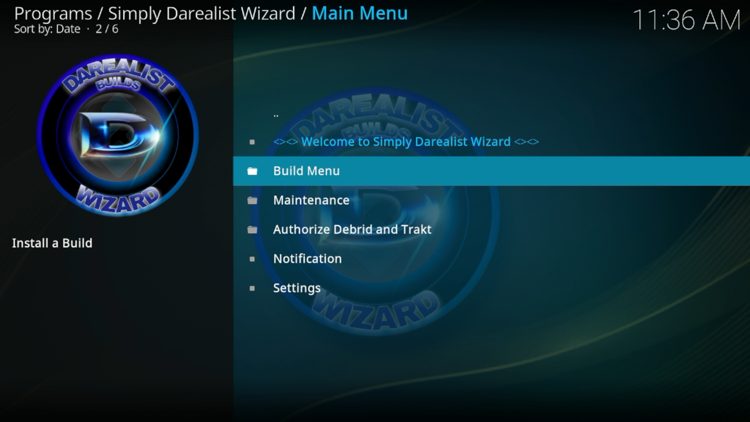
Credit: recoverit.wondershare.com
Why Use Maintenance Tools
Maintenance tools help keep Kodi running smoothly. They clean junk files, fix errors, and improve speed. Using these tools saves time and avoids frustration from crashes or slowdowns. Regular maintenance makes your Kodi experience better and more reliable.
Benefits For Kodi Performance
Maintenance tools clear cache and temporary files. This frees up storage space on your device. They also remove broken add-ons that slow Kodi down. These actions help Kodi start faster and run without lag.
Some tools optimize settings for better streaming quality. They check for updates and keep Kodi up to date. This reduces buffering and playback issues. Overall, maintenance tools boost Kodi’s stability and speed.
Common Issues Resolved
Maintenance tools fix many typical Kodi problems. They repair corrupted databases that cause crashes. They clean thumbnails and packages that fill storage unnecessarily.
These tools also handle dependency errors from add-ons. They clear old log files that may cause errors. This helps prevent freezes and unexpected shutdowns. Using maintenance tools solves many annoyances in one go.
Choosing The Right Maintenance Tool
Choosing the right maintenance tool for Kodi is essential for smooth performance. The correct add-on keeps your system clean and fast. It helps clear cache, delete unused files, and fix common errors. Not all maintenance tools work the same way. Some offer more features, while others focus on simplicity. Picking the best one depends on your needs and device compatibility.
Popular Maintenance Add-ons
- Indigo: Offers cleaning, backup, and troubleshooting features.
- Ares Wizard: Known for system checks and cache clearing.
- Supreme Builds Wizard: Includes maintenance and build management.
- Open Wizard: Focuses on easy cleaning and updates.
These add-ons are trusted by many Kodi users. They receive regular updates and support. Each has unique tools to keep Kodi running well.
Compatibility Considerations
Check if the maintenance tool supports your Kodi version. Some add-ons work only on specific Kodi builds. Device type matters, too. Tools designed for Android may not work well on Windows or Fire Stick.
Look for add-ons that match your device’s performance. Lightweight tools suit low-end devices. Advanced tools may need more resources.
Always verify the source of the add-on. Use official or well-known repositories to avoid issues.
Preparing Kodi For Installation
Before adding any maintenance tool to Kodi, it’s crucial to prepare the app properly. This preparation ensures smooth installation and prevents common errors that can waste your time. Getting Kodi ready might seem simple, but missing a step can block you from accessing useful features.
Enabling Unknown Sources
Kodi blocks installations from unknown sources by default to protect your device. But to add third-party maintenance tools, you need to change this setting.
Here’s how you can enable unknown sources:
- Open Kodi and go to Settings(gear icon).
- Select System Settings.
- Navigate to Add-ons.
- Toggle the switch for Unknown Sourcesto On.
- Confirm the warning prompt by clicking Yes.
Have you ever hesitated to enable unknown sources because of security fears? While caution is good, enabling this temporarily and only for trusted repositories is both safe and necessary for customization.
Checking Kodi Version
Knowing your Kodi version is key before installing any maintenance tool. Some tools only work with specific versions, and ignoring this can cause compatibility issues.
To check your Kodi version:
- Go to Settings.
- Select System Information.
- Look for the version number, usually displayed at the top.
If your version is outdated, consider updating Kodi first. A quick update often solves many installation headaches and ensures you get the best performance from your maintenance tool.
Step-by-step Installation Guide
Adding a maintenance tool to Kodi can significantly improve your streaming experience by keeping the system clean and running smoothly. The process might look technical, but it’s actually straightforward when broken down. Let’s walk through the installation so you can get your Kodi optimized quickly.
Adding The Repository Source
First, you need to let Kodi know where to find the maintenance add-on. Open Kodi and go to the Settingsmenu, which looks like a gear icon. From there, select File Manager.
Click on Add Source, then enter the URL of the repository hosting the maintenance tool. Be sure to type the URL exactly as given to avoid errors. Give the source a name you’ll remember, like MaintenanceRepo, and click OK.
Have you ever skipped this step and ended up frustrated? Taking a moment to enter the correct source prevents wasted time troubleshooting later.
Installing The Maintenance Add-on
Next, return to the Kodi home screen and select Add-ons. Click the open box icon at the top to access the Install from zip fileoption.
Find the source you just added, select the zip file inside, and wait for the notification confirming the repository is installed. After that, choose Install from repository, locate the repository by its name, and then browse to Program add-ons.
Find your maintenance tool in the list and hit Install. Kodi will download and set it up automatically. When was the last time you installed an add-on without hitting a snag? This clear path helps you avoid common pitfalls.
Once installed, you can access the maintenance tool anytime from the Add-ons menu. It’s that simple to keep Kodi in top shape.
Configuring Maintenance Tools
Configuring maintenance tools in Kodi helps keep your system running smoothly. These tools manage cleanup tasks and backups automatically. Setting them up correctly saves time and prevents errors.
Setting Auto Cleanups
Auto cleanups remove unnecessary files to free space. Enable this feature in the maintenance tool settings. Choose how often cleanups should run, like daily or weekly.
Select the types of files to delete, such as cache, thumbnails, or logs. This keeps Kodi fast and responsive. You can also set alerts to notify you after cleanup completes.
Scheduling Backups
Scheduling backups protects your Kodi setup from data loss. Set a regular backup time, such as every night or week. Pick which data to save, like add-ons and settings.
Store backups on external drives or cloud storage for safety. Automated backups mean you never forget to save your data. Restore your system quickly if needed.
Using Maintenance Tools Effectively
Using maintenance tools effectively in Kodi can keep your media center running smoothly and free from clutter. These tools help you manage storage, speed up performance, and avoid annoying crashes. Taking a few minutes regularly to clean and organize your Kodi setup can make a noticeable difference in your viewing experience.
Running Cache Cleanups
Cache files build up quickly as you stream content, which can slow down Kodi over time. Running cache cleanups clears temporary files that are no longer needed. This frees up memory and reduces buffering issues.
Most maintenance tools offer an easy way to clear cache with a single click. You don’t have to dig through settings or delete files manually. Do you notice Kodi getting sluggish after long use? Regular cache cleaning might be the simple fix you need.
Managing Thumbnails And Packages
Thumbnails and packages can take up significant space if left unmanaged. Thumbnails are the images Kodi uses to display media covers, and packages are leftover files from installed add-ons.
Maintenance tools let you delete old thumbnails and unused packages safely. This helps reclaim storage and speeds up Kodi’s interface. Paying attention to these files prevents Kodi from getting bloated and slow.
Try scheduling thumbnail and package cleanups weekly. It’s an easy habit that keeps Kodi tidy without interrupting your entertainment.
Troubleshooting Installation Issues
Installation issues can be frustrating, especially when you’re eager to enhance your Kodi experience with a maintenance tool. Troubleshooting these problems requires a clear approach and some patience. Let’s break down common issues you might encounter and practical ways to solve them.
Resolving Repository Errors
Repository errors often occur because the source URL is incorrect or the repository is temporarily offline. Double-check the URL you entered for typos or outdated links. Sometimes, repositories move to new addresses without widespread notice.
If you see a “Could not connect” or “Failed to install” message, try these steps:
- Check your internet connection to ensure it’s stable.
- Clear Kodi’s cache to remove any corrupted data blocking the download.
- Restart Kodi and attempt the installation again after a few minutes.
Have you ever ignored a small typo in a URL only to waste hours troubleshooting? It’s a common trap that’s easy to avoid with careful attention.
Fixing Add-on Failures
Add-on failures can happen due to version incompatibilities or missing dependencies. When an add-on won’t install or update, look at the error message closely—it often hints at what’s missing.
To fix these failures:
- Ensure your Kodi version is up to date; older versions may not support new add-ons.
- Manually install any required dependencies listed in the error message.
- Try installing the add-on from a different repository if the current one seems unreliable.
One time, I struggled with a maintenance tool add-on because my Kodi was outdated. Updating Kodi solved the problem instantly. It’s a reminder that sometimes the simplest fix is the most effective.

Credit: troypoint.com
Tips For Optimal Kodi Performance
Keeping Kodi running smoothly requires more than just installing a maintenance tool. You need to develop habits that support its performance over time. These tips will help you manage Kodi efficiently, avoid crashes, and enjoy a seamless streaming experience.
Regular Maintenance Habits
Clearing cache and temporary files regularly prevents Kodi from slowing down. You might notice that after a few weeks of use, Kodi starts lagging or freezing. This often happens because old data builds up in the background.
Try setting a reminder to clean Kodi’s cache every couple of weeks. You can do this manually or use maintenance add-ons that automate the process. Also, deleting unnecessary thumbnails and packages frees up space and improves loading times.
Have you ever wondered why some streams buffer endlessly? It could be due to cluttered data affecting Kodi’s performance. Keeping your system tidy is a simple step to reduce buffering and crashes.
Keeping Add-ons Updated
Add-ons bring amazing features to Kodi, but outdated ones cause errors and slowdowns. You should regularly check for updates to keep your add-ons compatible with the latest Kodi version.
Many add-ons notify you when updates are available, but don’t wait for alerts. Make it a habit to visit the add-on repository or use the update option within Kodi. This practice prevents unexpected failures and security risks.
Think about the last time an add-on stopped working suddenly. Updating often solves such issues before they disrupt your viewing. Staying proactive with updates keeps your Kodi experience hassle-free and enjoyable.

Credit: troypoint.com
Frequently Asked Questions
What Is The Maintenance Tool In Kodi?
The Maintenance Tool in Kodi helps optimize and clean your media center. It clears cache, deletes thumbnails, and manages backups. This improves Kodi’s performance and fixes common errors. Adding this tool keeps your Kodi running smoothly and efficiently.
How Do I Install Maintenance Tool On Kodi?
To install the Maintenance Tool, add the appropriate repository URL in Kodi. Then, browse the repository to find the tool under Program Add-ons. Click install and wait for the confirmation notification. Finally, launch the tool from the Add-ons menu.
Can Maintenance Tool Fix Kodi Buffering Issues?
Yes, the Maintenance Tool helps fix buffering by clearing cache and thumbnails. It removes unnecessary files that slow down streaming. Regular use can enhance playback speed and reduce buffering interruptions on Kodi.
Is The Maintenance Tool Safe To Use On Kodi?
Yes, the Maintenance Tool is safe and widely used by Kodi users. It only removes temporary files and backups without affecting your media content. Always download it from trusted repositories to ensure security.
Conclusion
Adding a maintenance tool to Kodi keeps it running smoothly. It helps clear cache, manage add-ons, and enhance performance. Regular checks ensure your Kodi stays efficient. Follow the steps carefully for a seamless experience. A well-maintained Kodi means fewer issues and more enjoyment.
Spend less time troubleshooting and more time watching. Enjoy your favorite shows without interruption. Keep your system tidy and organized. It’s simple and makes a big difference. Stay consistent with maintenance for long-term benefits. Your Kodi experience will improve greatly.
Happy streaming!